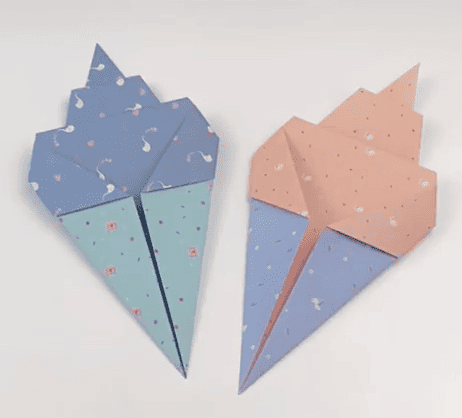
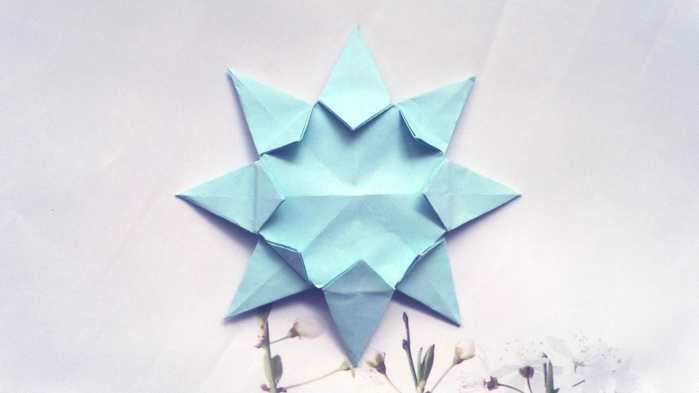
Making a simple paper sun is a fun and creative handicraft activity. We can transform an ordinary piece of paper into a vibrant paper sun, adding a splash of bright color to our lives. Now, let's take a look at the detailed tutorial for this simple and beautiful paper - folded sun.

You need to prepare two square - shaped colored papers of the same color because they will be put together.
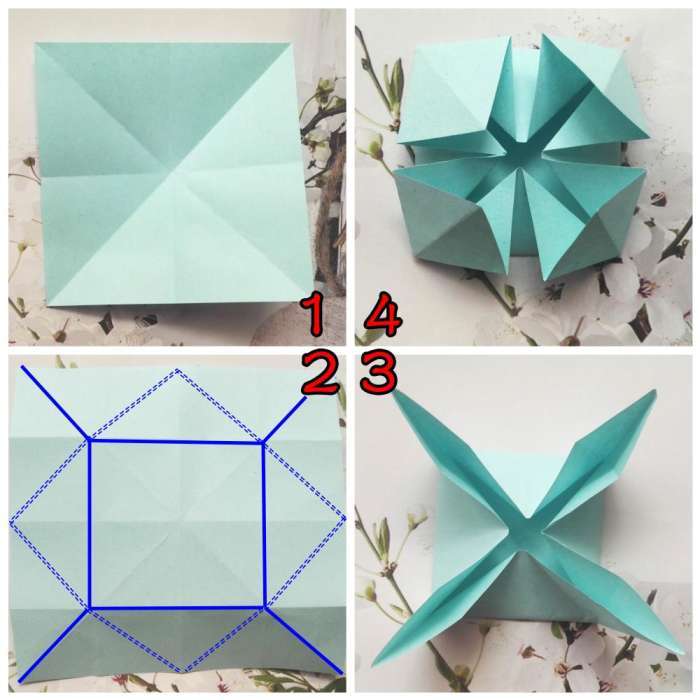
Step 1: First, fold the square paper into a 'rice - shaped' pattern (with two diagonal creases intersecting). Then, fold the two sides towards the middle crease respectively to create marks, like the square marked by the blue solid lines in Figure 2 above.
Step 2: According to the lines marked in Figure 2 above, expose the top - corner and fold the four sides towards the middle to form the shape in Figure 3.
Step 3: In Figure 3 above, press the four upper - corners downwards, and press and stretch the middle opening towards the two sides. Like in Figure 4.

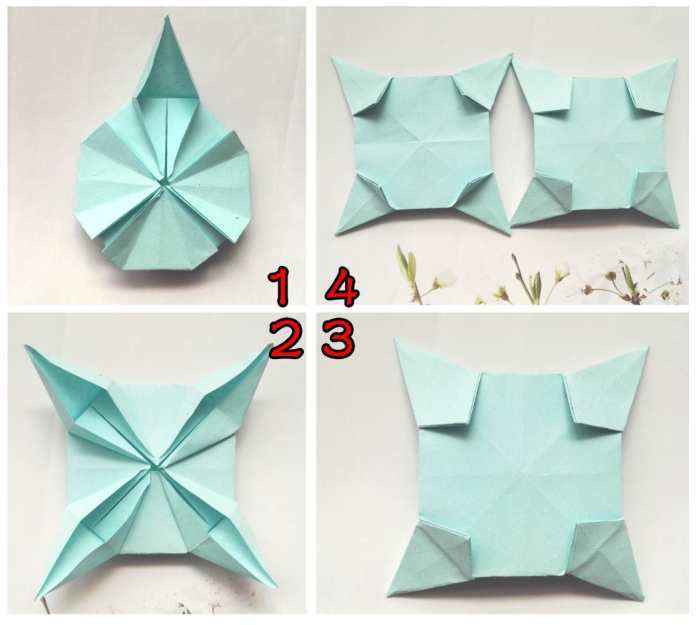
Step 4: Fold the part marked by the blue line in Figure 1 above inwards, following the folding method of one of the completed corners.
Step 5: After folding the four corners, fold the parts marked by the red triangles in Figure 2 above backwards to form Figure 3.
Step 6: Then, open the sides folded in Step 4, like in Figure 4.
Step 7: In Figure 4 above, there are four surfaces marked with blue dots. Open each of them upwards.
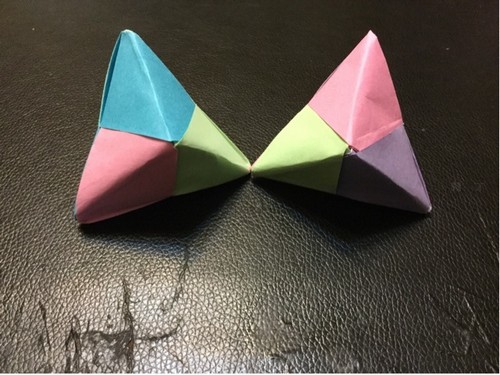
Step 8: After opening, it will be like shown in Figure 1 above. Then, open all four corners to form Figure 2.
Step 9: Then, turn the completed piece over, and it will look like Figure 3. Make two identical pieces.
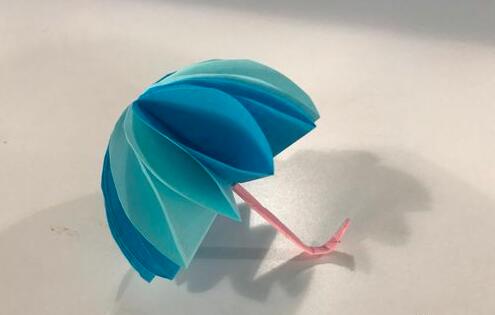
Step 10: Stack the two pieces together, and then press down all the small triangles in the middle. This is what the paper sun in the figure above looks like.