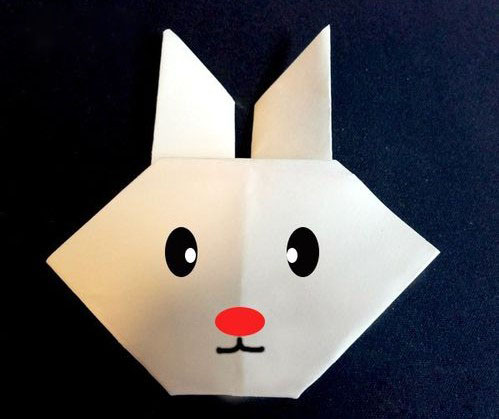
Through the step - by - step illustration of origami rabbit, we can transform an ordinary piece of paper into a vivid rabbit model, adding a touch of lively color to our lives. Now, let's briefly introduce the folding steps.
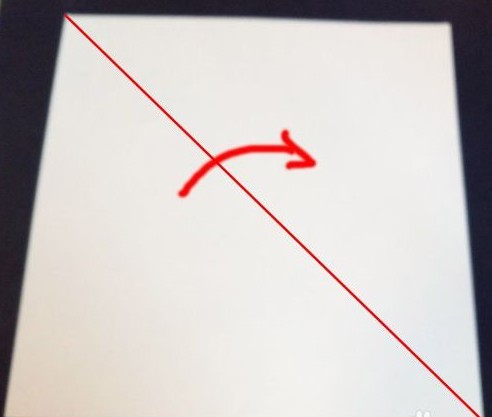
First, select a square piece of colored paper. It is recommended to choose light colors, such as white or light yellow. Fold the square colored paper along the diagonal.
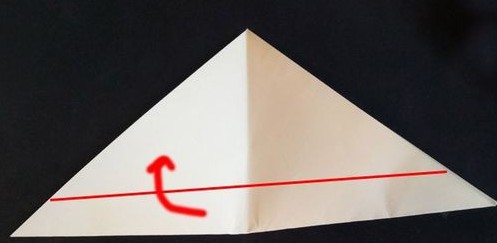
Take the folded triangular colored paper, fold it along the mid - line shown in the following figure, and then unfold it. You can clearly see the crease effect.

Fold the bottom edge of the unfolded triangle upwards along the line marked in Figure 1. The folded effect is shown in Figure 2 below. Also, pay attention to the directions of the two arrows.
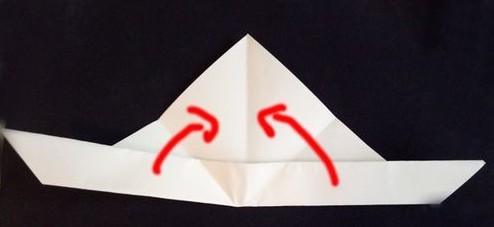
Look at Figure 1 below. Fold the two bottom edges upwards along the diagonal lines shown in the figure. Fold the left and right sides symmetrically. After folding, the shapes of the two ears will emerge. Make sure the left and right sides are of the same size.
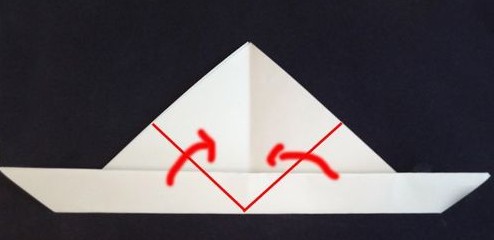
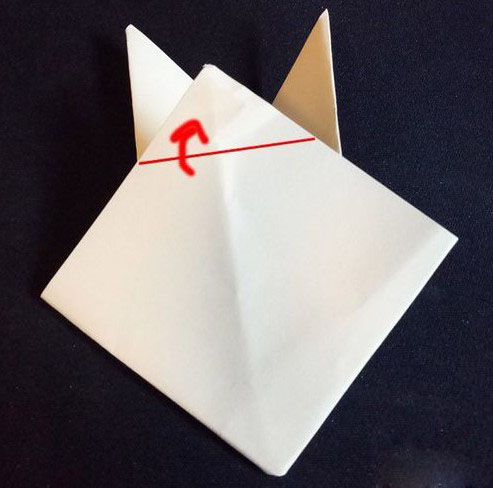
The folded effect of Figure 2 above is shown in Figure 1 below. Then, turn the colored paper to the back side. As shown in Figure 2 below, at the position marked with a red line, fold the sharp corner of the rhombus inwards along the horizontal line.
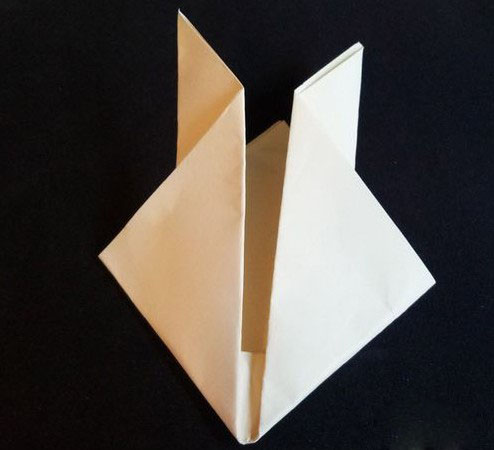
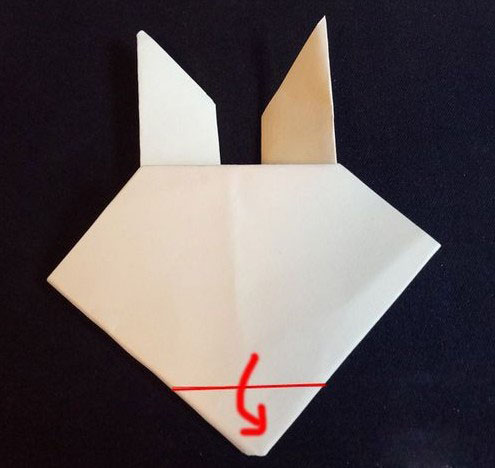
The effect after the previous step of folding is shown in Figure 1 below. The shape of the head has emerged. Then, create the shape of the chin. Fold the bottom sharp corner backwards along the line marked in Figure 1. The folded effect is shown in Figure 2 below.
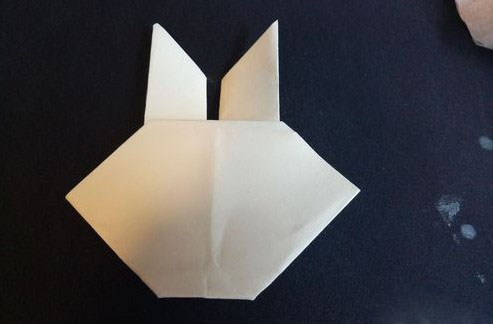
Up to this step, the head of the little rabbit is completely folded. Next, kids just need to use colored pens to draw the eyes, nose, and mouth of the little rabbit, and then it's done.