Dear parents, are you still worried about your children's handicraft activities? We've brought you an extremely simple tutorial on how to fold a children's paper airplane! With just an ordinary piece of paper and by following the clear steps, you can fold a paper airplane that flies high and far. The tutorial is easy to understand and suitable for parent - child interaction. Come and get hands - on, and let the paper airplane soar into the blue sky with dreams!

Simple Tutorial on How to Fold a Children's Paper Airplane
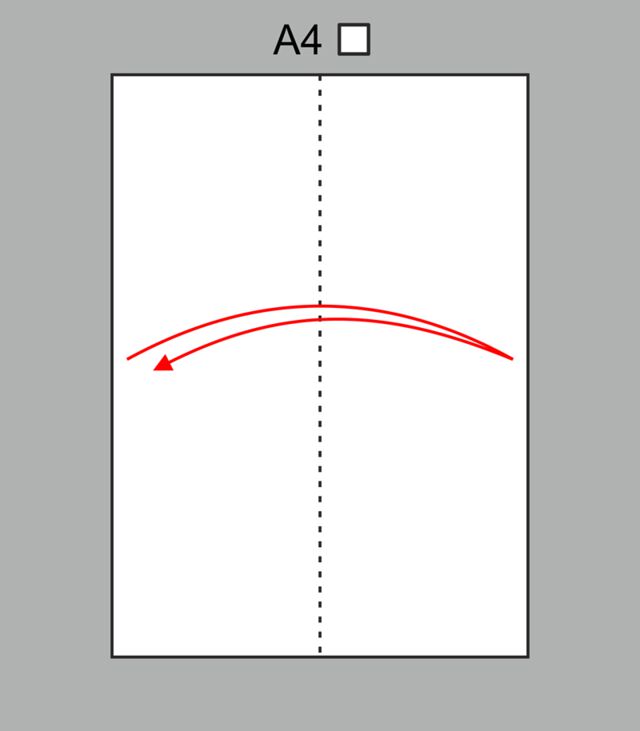
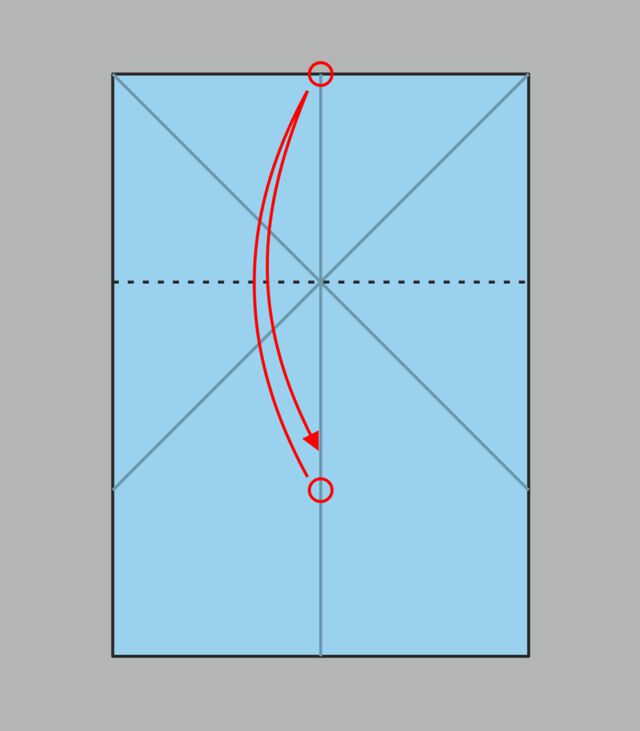
Step 1: Fold an A4 paper in half.
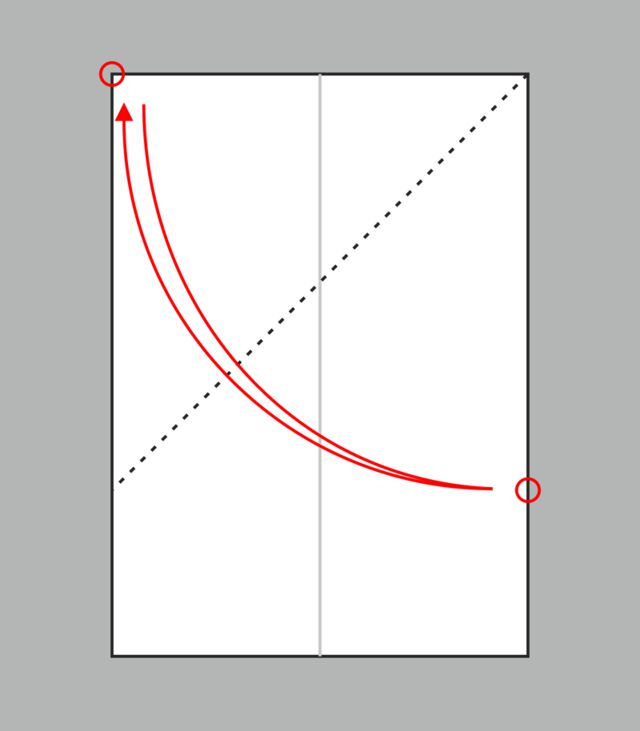
Step 2: After unfolding, fold the upper - left corner inwards so that one side aligns with the right - hand edge.
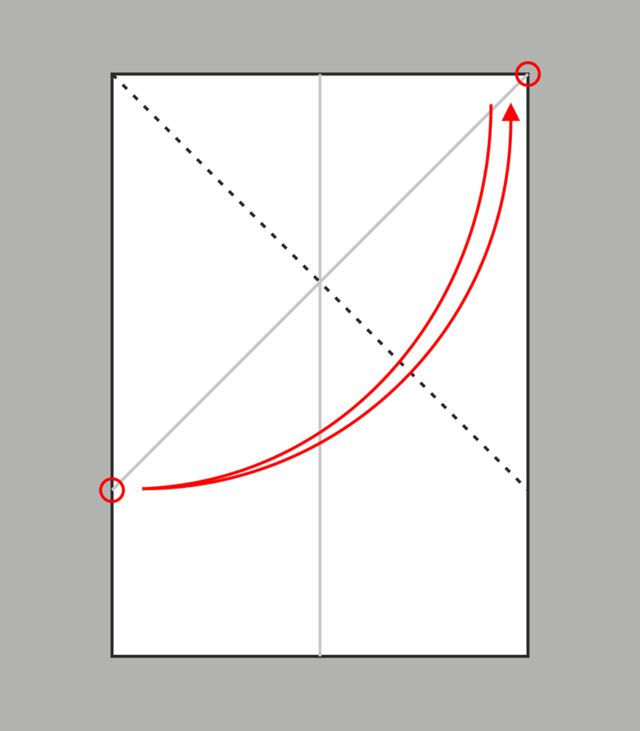
Step 3: After unfolding, do the same operation on the right - hand corner.
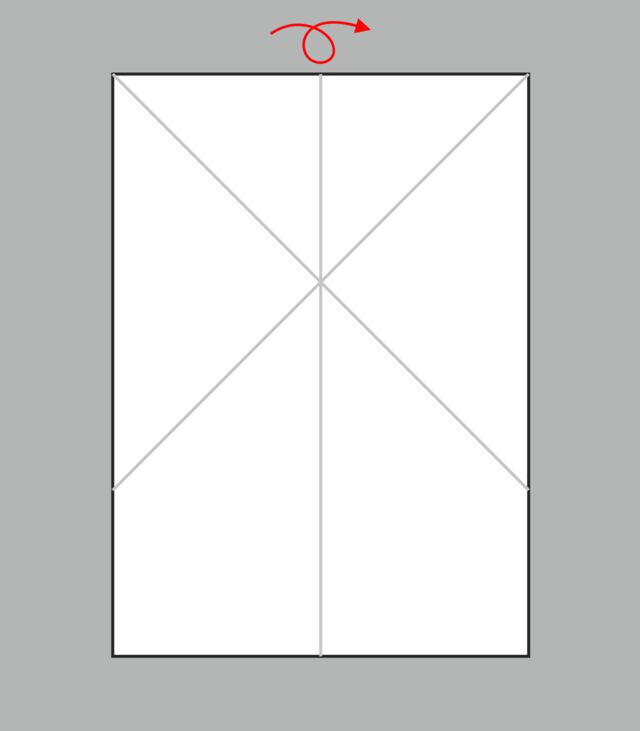
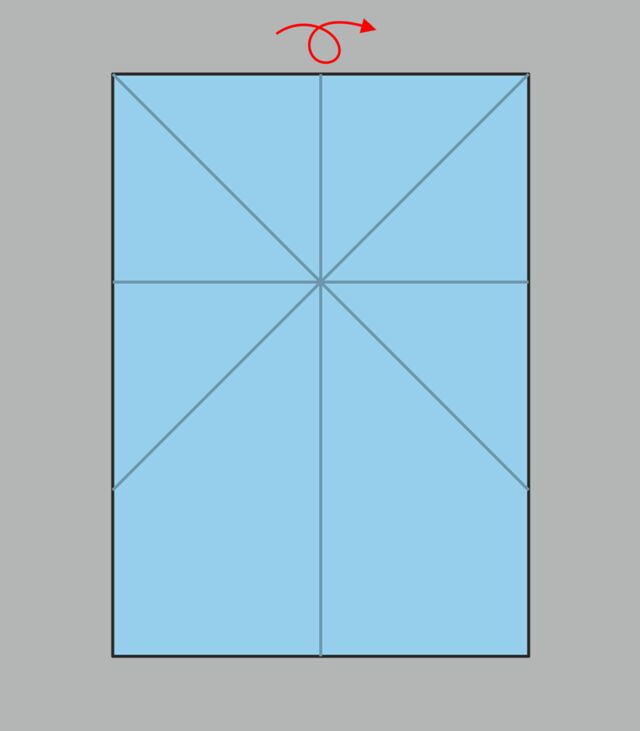
Step 4: Unfold it completely.
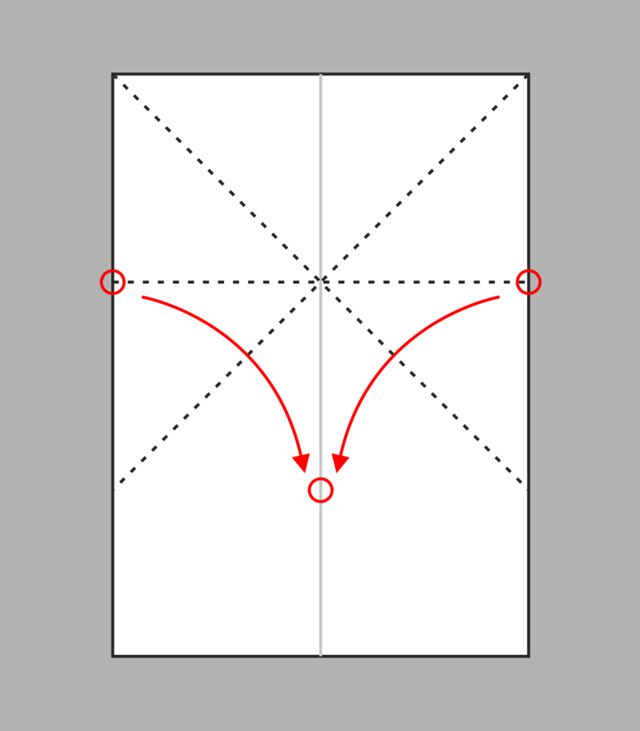
Step 5: Fold the upper edge of the paper inwards along the intersection point of the three creases.
Step 6: Unfold it completely again.
Step 7: Pull in the positions of the two red circles on the left and right.
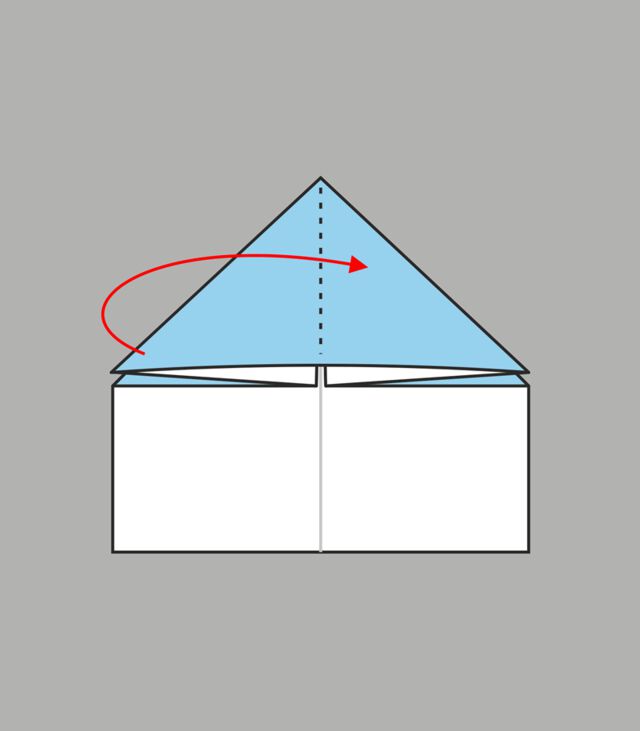
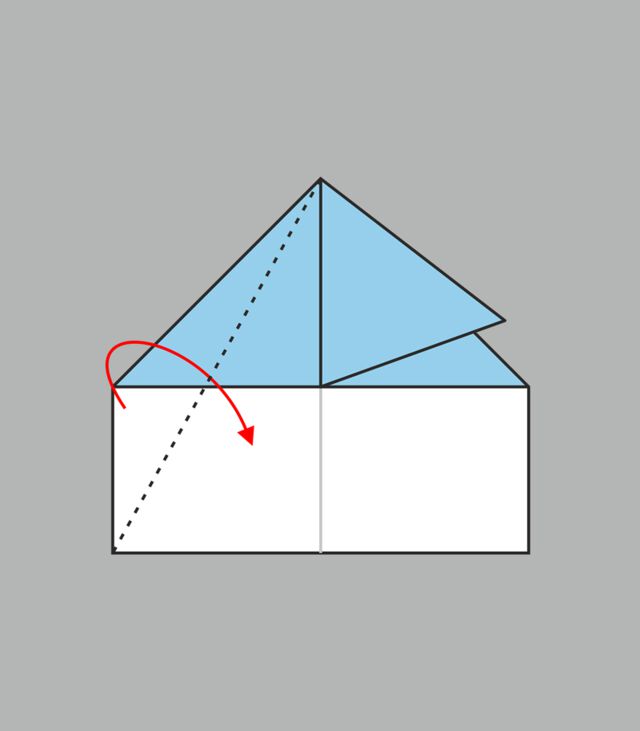
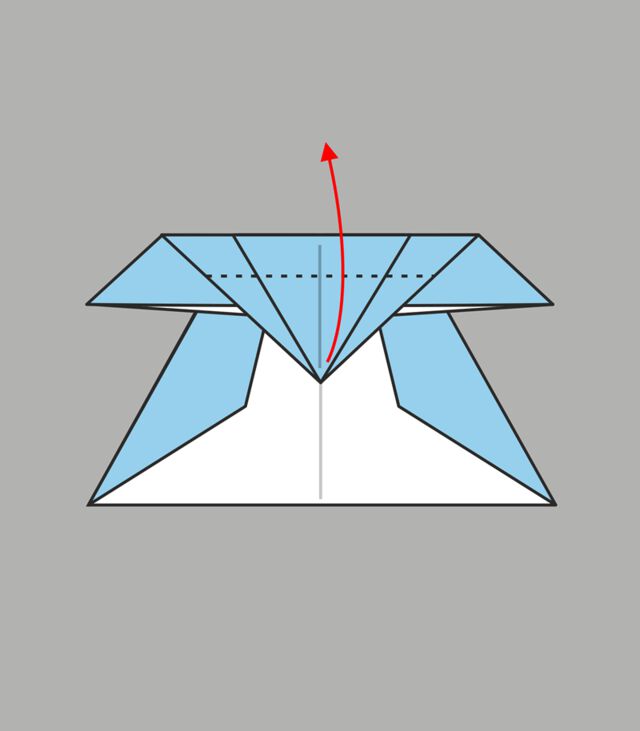
Step 8: It forms the effect as shown in the following picture. Then fold the upper layer on one side to the right.
Step 9: Fold the bottom layer inwards along the dotted line.
Step 10: Then fold back the upper layer on the surface.
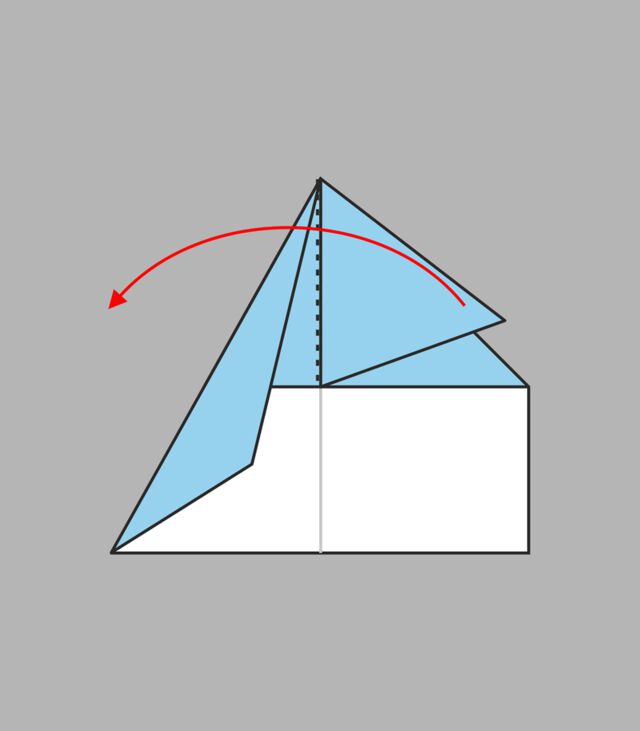
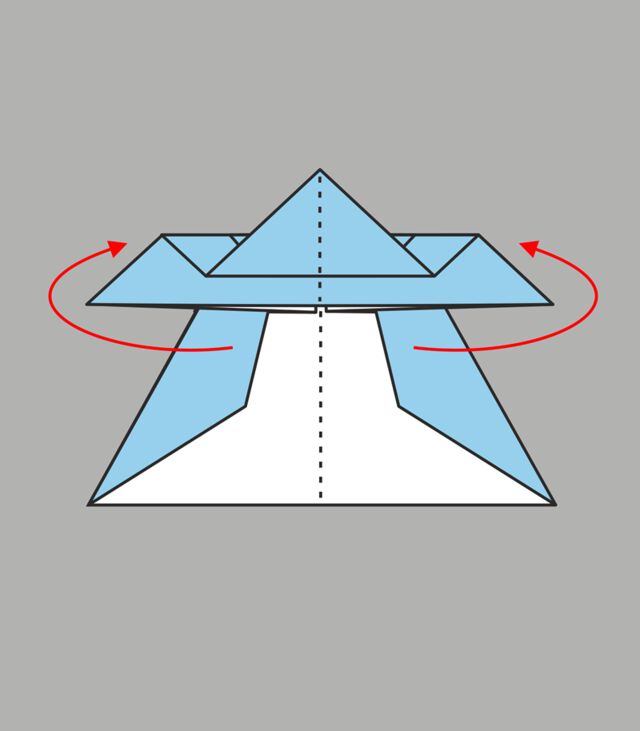
Step 11: Fold the right - hand side in the same way.
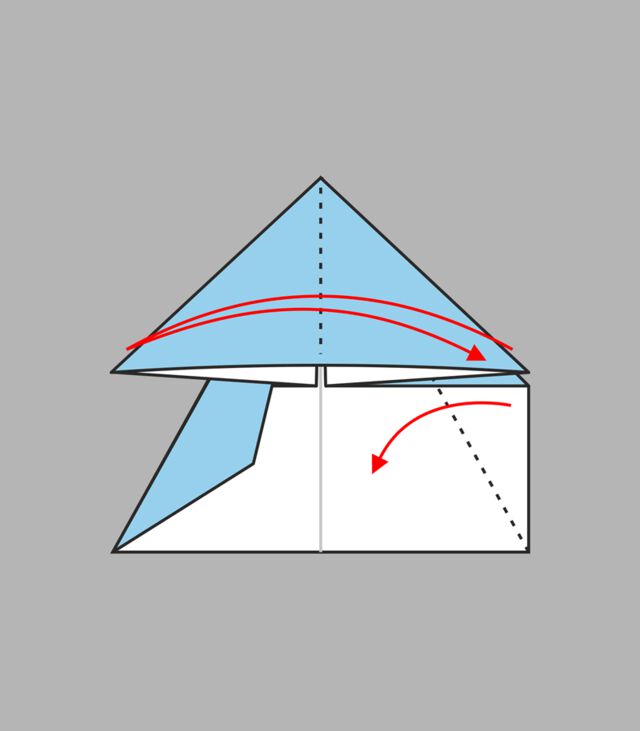
Step 12: Fold the tip of the triangle back along the dotted line.
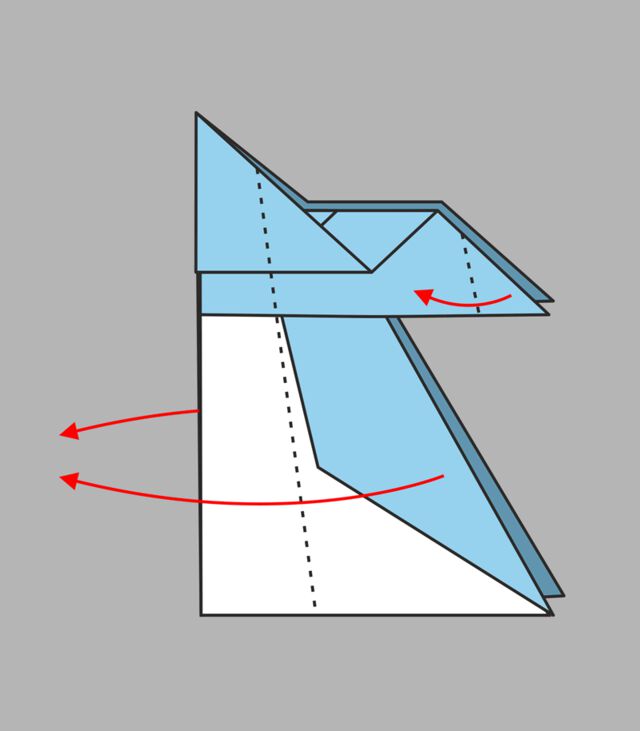
Step 13: Then fold it back upwards along the dotted line.
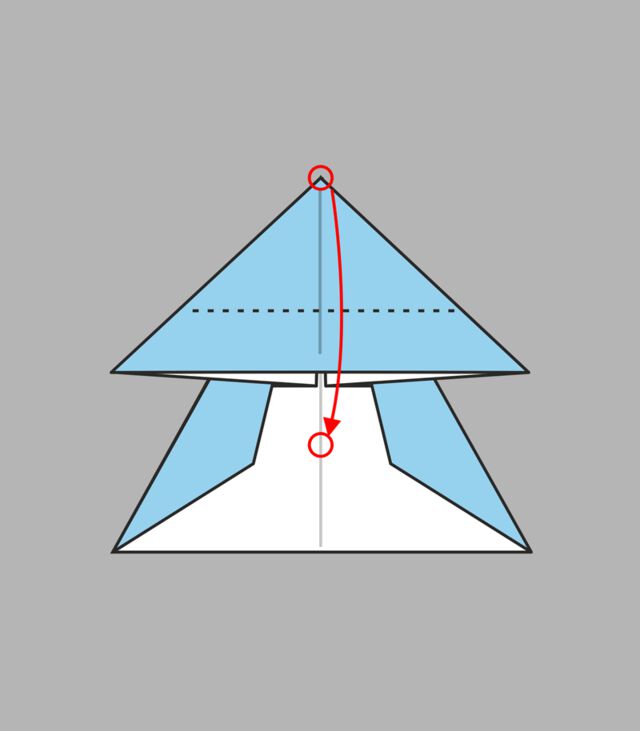
Step 14: Fold the left and right sides together along the middle dotted line.
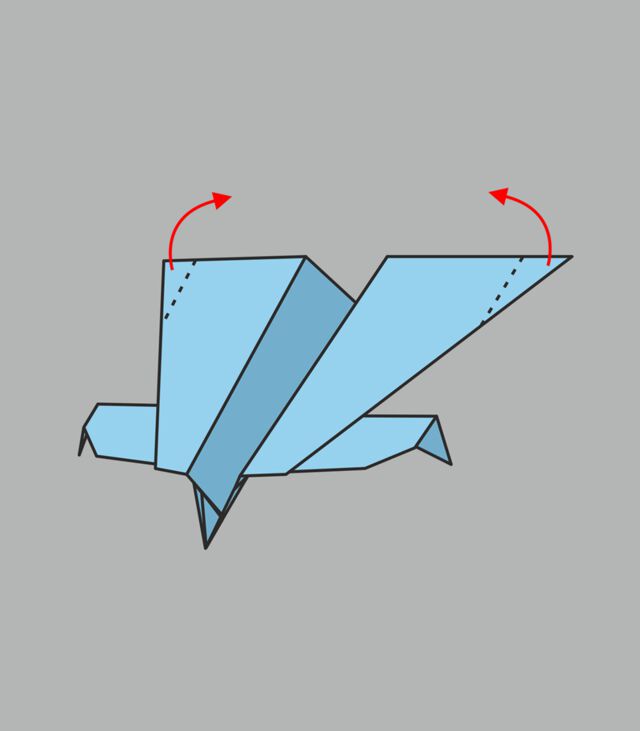
Step 15: Then fold it in the opposite direction along the two dotted lines.
Step 16: Finally, fold the tail of the airplane upwards along the dotted line again.
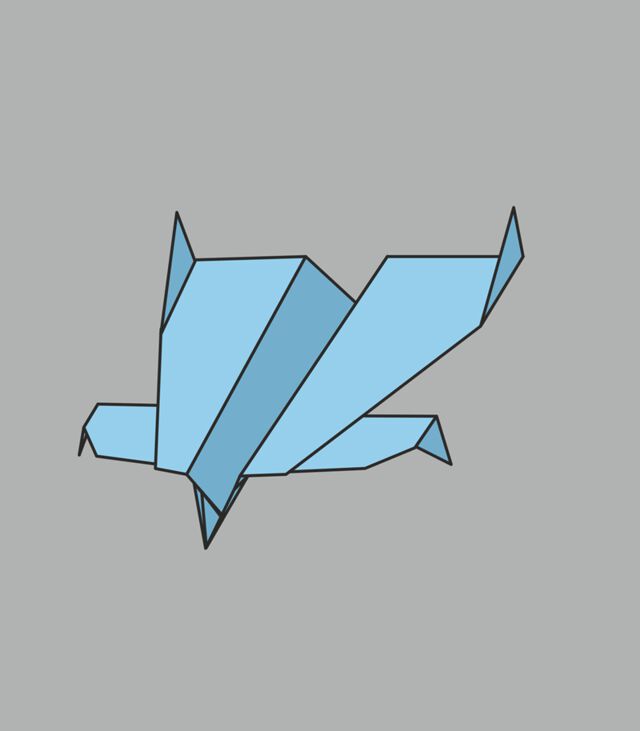
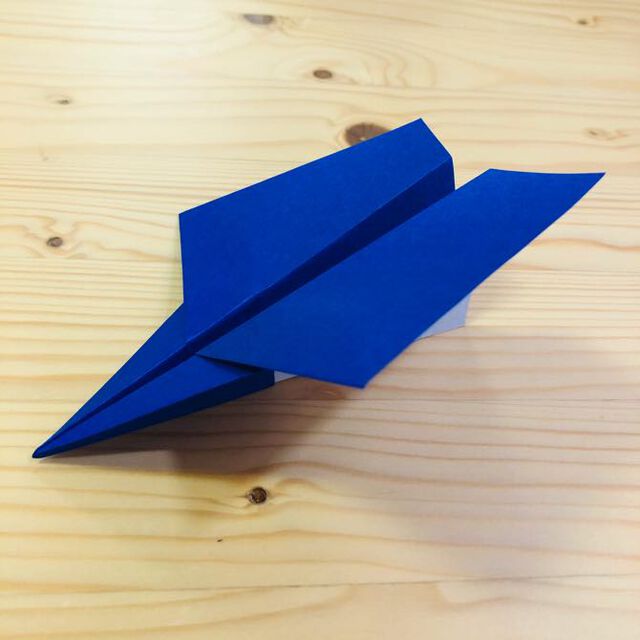
Step 17: Well, a beautiful paper airplane is completed.